
If you own a brick and mortar store, how do you compete with ecommerce shopping sites? The answer is simple. Take advantage of Google Local Inventory Ads (LIA). These ads show your physical store information, and let shoppers know they can find what they are looking for at your local store.
Recent statistics show that nearly 70% of consumers use some form of Buy Online, Pickup In Store (BOPIS), making local inventory a huge factor in the final decision of where to buy a particular product. That percentage may be even higher in the midst of COVID-19.
Still not convinced? Check out some statistics Google put together showing how many shoppers would rather make a purchase at a local storefront than online.
- Brick and mortar locations will capture 90% of global sales.
- A whopping 84% of consumers search locally for merchandise.
- Nearly 75% of people searching for nearby merchandise on their smartphone show up in the store within the next day, and 28% of them make a purchase.
So you can see that by putting your available inventory online in Google Local Inventory Ads, you can capture some of that business. But do they really work? The answer is a resounding Yes. Google,reports that 100 clicks on store ads results in 10 to 18 store visits.
Are you Eligible?
Currently, you can post Local Inventory Ads if you are a brick and mortar retailer in the United States, Canada, the UK, Australia, Austria, Brazil, Canada, Denmark, France, Germany, Japan, Netherlands, Norway, Sweden, and Switzerland.
The idea behind this advertising is to drive customers to your physical store, not to your website or ecommerce site. Your store must be open to the public. Google doesn’t allow “by appointment only” or “appointment required” policies when it comes to Local Inventory Ads. In addition, your store must actually carry and sell physical merchandise.
The Cost of Google Local Inventory Ads
Google doesn’t charge you an upfront fee for posting Local Inventory Ads. You pay based on the number of clicks on your ad or other links to land on one of your pages or website. You’ve probably heard of Pay-Per-Click (PPC) advertising. In an LIA, a click on your Google-created “storefront” generates a PPC.
Once the customer is “in the door” of your Google hosted local storefront, any further interactions are on the house courtesy of Google.
By letting people know what you have in stock, Local Inventory Ads can make your PPC dollars go further. When local shoppers come to your physical store for what they clicked on on Google, you have the opportunity for them to see related products, and get more sales.
Getting Started with Your Google Merchant Center
So if all of this sounds like a great idea, you’re ready to begin the process of running Local Inventory Ads. There are several steps involved:
Step 1: Set up the necessary accounts.
Local Inventory Ads work in hand in hand with a number of Google’s other offerings. The first thing you will need is a Google Account. If you don’t already have one, set one up. Then you will need accounts for each of the following:
- Merchant Center: Set up a Merchant Center account and add all of your business information, and where you want shoppers to check out (through Google, on your website, or at your physical location).
- Google Ads Account: You will link this to your Merchant Center account.
- Google My Business Locations: This will require specifics about your business location(s), so be sure to have all of that information handy. This will also be where you create your store’s unique identifier, which you’ll need when you create your local feed.
Step 2: Enable Local Inventory Ads in Merchant Center
Once you have set up your accounts, you need to enable LIAs in your Merchant Center settings.
- Sign in to the Merchant Center.
- Click Growth in the navigation menu.
- Click Manage Programs..
- Click Get Started on local inventory ads.
- Confirm you have met the qualifications.
- Click the + button.
- Choose the country where your physical store(s) is located.
Step 3: Create your Shopping and Local Products Feeds
To set-up your Google Local Inventory, you’ll need to set-up four different feeds:
- Google Shopping Feed: This is your basic product ads feed.
- Local Products Feed: This feed displays a list of available products at each of your stores.
- Local Product Inventory Feed: This feed displays specific product information such as price, availability, and store location-specific information.
- Business Information Feed: This displays information about your store or multiple locations including addresses and store hours, and feeds that information to Google My Business.
Next, you can give Google information about your products through the local products feed. Be sure to do it in the correct format, and make sure all of the information is accurate, spelled correctly, etc.
Google has a complete list of mandatory and optional attributes for each item, including:
- ID
- Title
- Description
- Image link
- Brand
To optimize your products, for each choose a product title that matches popular Google search terms for the product. For ideas, take a look at competitors’ ads. For instance, if they use the brand name and model number of a product, you might want to do the same. Use Google’s Keyword Planner to research potential words and get an idea of the traffic that might be generated by certain keywords.
Once you have entered the information for all of your products that you want to promote through Local Inventory Ads, it’s time to give Google location-specific information about your products.
You can find a full list of location attributes here, including:
- Store code
- Quantity available
- Item ID
- Price
Step 4: Register and submit your inventory verification.
Once you have completed entering all of the information for your feeds, you will need to request and submit inventory verification in your Merchant Center.
After Google has received them, they’ll start an inventory verification process. Verification may occur in person or over the phone. You want to make sure your in-store inventory always matches your local product feed. Update information daily. .
Step 5: Enable Your Local Inventory Ads
Now that you’ve received inventory verification, it’s time to enable your local inventory ads. Do this by signing into your Google Ad account. Then, access the shopping campaign you want, navigate to Settings, then select Shopping Settings (Advanced).
Finally, check the enable local inventory ads box and you’re all set!
Tips for Success
Google Local Inventory Ads help local brick-and-mortar stores by finding the customers looking for products nearby, but just signing up for Google Local Inventory Ads isn’t enough.
Here are some tips for making the best use of your LIAs.:
Upload Frequently
We cannot stress this enough. You should update Local Inventory products at least once a day. Customers will be disappointed and not trust you in the future if they come in for an item and it’s out of stock.
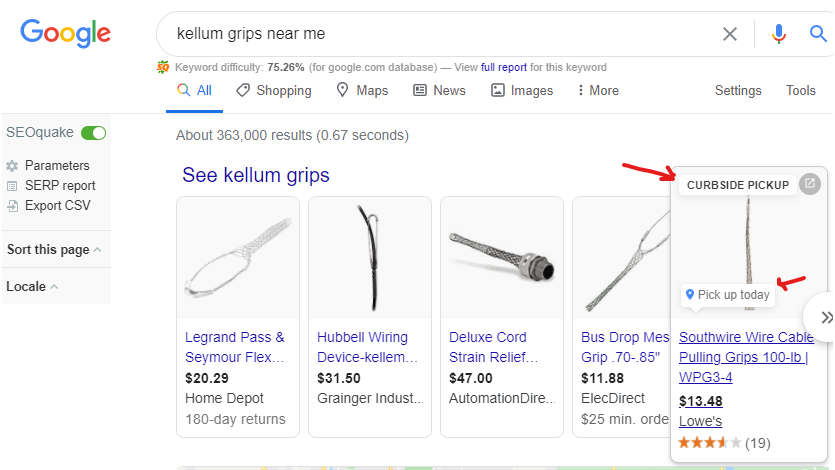
Understand What Your Local Inventory Ads Will Look LIke
Understand that your ads will appear slightly differently on different platforms. On a desktop, customers will see much more complete information on the main Google page. But in order to be mobile-friendly, you want to present your most informative and clear images up front. Before you let an ad go live, you need to test it on both a desktop and mobile device to make sure everything looks right.
DIY or Hire the Pros?
While running your own Google Merchant Center and keeping your Local Inventory Ads up to date is certainly possible to do yourself, you may want to consider working with a firm that offers PPC Services. Working with professionals who are up to date on all of the latest digital marketing strategies helps ensure you’re taking full advantage of all that a Google Merchant Center has to offer.